In this post, we will detail step by step our process of making candles.
It all begins with choosing the right fragrance. The fragrances we use are purchased from a couple of excellent candle supply companies. Upon deciding the fragrance, I must also decide how much of it to make. For each pound of soy wax, I will typically use one ounce of fragrance. This can vary a little depending on the strength or weakness of the fragrance. How much to use differs if I am making aromatherapy candles using essential oils. In that case, I will use about 400 drops of pure essential oil or 4 teaspoons for each pound of wax.

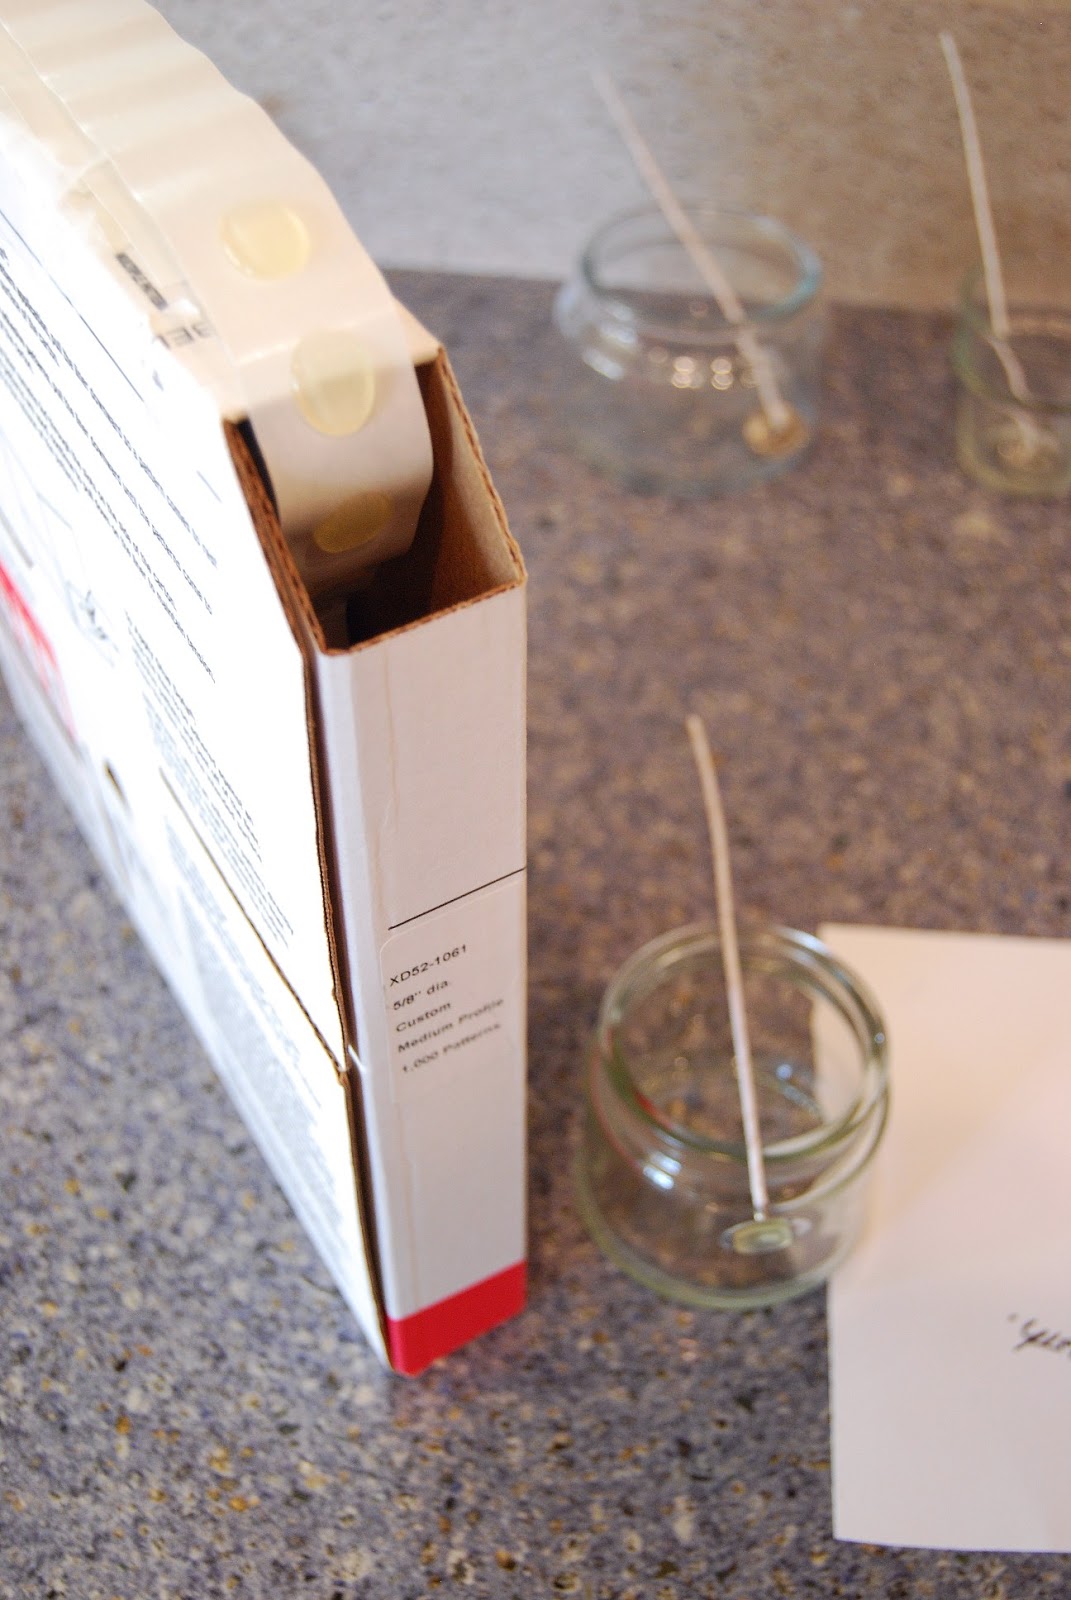
After selecting the fragrance, I decide how much wax to melt for that particular batch. I calculate the pounds of wax I will be melting and how many containers of various sizes that amount will fill. After choosing the right amount and size of containers, I must select the right size of wick to go with each one. There are different sizes of wicks, and it depends on the diameter of the container which wick will work best. If I don’t choose the right wick, the candle will not burn correctly. If the wick is too small, it will not create the right burn pool and there will be a lot of wasted, unused wax. If the wick is too large for the container, it will cause it to become dangerously hot when it burns, and it will also burn the wax too quickly. (Any time I get a new type of container I’ve not worked with before, I must spend time figuring out which wick will work best for it. I perform “trial candle burns” with the container, using two or three different possible wicks and seeing which one is the right match.)

Once I have all the containers I need and the right wick to go with each one, the next step is to mark each container at the exact center point where the wick must be placed. Before making that mark, I swab the bottom of the container with alcohol so that the surface is squeaky clean and the wick will not have any problems adhering to the glass and staying put. When I skipped this step in the past, it only caused problems. If there is any dust residue or skin oil on the part of the container where the wick goes, and I stick the wick on without prior cleaning, when I pour the wax in, the wick will come lose. The candle will then have to be re-poured, and I have wasted a lot of time and effort. After swabbing the bottom of the container with alcohol and letting it dry, I can make the center mark. I have created different templates for each one of the containers regularly used. I align each container on the correct template and mark the center point on the bottom. If I do not mark it accurately, the wick will be off-center causing uneven burning of the candle.

Following the center marking, I place a sticky glue dot on the bottom of the wick and stick the wick onto the center mark. I press the wick down well to make sure it adheres properly.
The next part in the process is my favorite. Not!…Just kidding! It is actually my least favorite part because it is tedious, although very important. I place a centering wick tool on the wick and measure its distance from the edges of the container to make absolutely certain it is in full center. Once again, if I do not perform this step as accurately as possible, the wick will be off-center and the candle will have a poor burn pool. I have had to purchase a variety of wick centering tools to work with the different sizes of containers that I have in stock. Some of the tools work better than others, and sometimes this step can feel quite time consuming. My goal is to make sure the wick is centered right because I want to be certain that I am selling to my customers the *best* candle I am capable of making for them. My family knows they are not to get near candle containers after I have spent the time getting the wicks set just right. If they are bumped, I will have to spend more time re-measuring and re-checking the centering. (And yes, I use that green “Chuck E Cheese” ruler in the picture. It’s my favorite for candle-making!)


With wicks centered and containers ready, I proceed to work with the soy wax. In the past, I used to begin melting the wax prior to preparing the containers. But this proved inefficient for me because I am such a perfectionist getting those containers and wicks ready. I would be in the middle of preparing containers and the wax would be ready and in need of attention causing me to feel hurried and flustered. So now, I wait until containers are all ready to go before I begin working with the wax. I pull out the melting pots and measure the amount of wax I want to melt in each one. The wax comes in flake form, and I easily scoop it out of a 50 pound box. I typically only melt up to 2 ½ pounds per pot because that is all the wax the fits well in the pot prior to melting. I weigh the wax in the pots on a scale to be sure that I have the correct amount.


Wax weighed and pots ready, I put the melting pot into another cooking pot that has a small amount of water—like a double boiler method. One should never heat the wax directly upon the stove because it can get overheated and become a fire hazard. I begin the heating process and continuously watch the wax, stirring occasionally, waiting for it to completely melt. This happens once the soy wax reaches 160-180 degrees. I stir with a whisk to break up the clumps of wax and distribute the heat throughout.

As soon as all the wax has fully melted, I turn off the heat and remove the melting pot from the pot with the water. I add the appropriate amount of fragrance along with a little bit of UV inhibitor additive. The UV inhibitor helps the candles keep their color. Exposure to light does begin to change the color of the wax, colored or not, and the UV inhibitor delays this process. After candles are made, while they are still in my possession, I keep them in a completely closed box to keep the light out. With the whisk, I mix in the fragrance and inhibitor and set a candy thermometer into the wax. It is now time for the cooling process. This can take a long while depending on how much wax is in the pot.


When the wax cools down to about 115 degrees, I pour it into the waiting containers. After pouring, it is absolutely critical that the containers are not touched or moved until the wax solidifies completely.


I leave them alone for many hours, usually overnight. During this time of waiting for things to set, I clean up, prepare the warning labels for the containers, write down how many and what kind of candles were made (to keep up with my ready-to-sell inventory), and also update how much fragrance has been used and no longer on hand.

When the candles have set, I remove the wick centering tools, trim the wicks down to a one-fourth of an inch, apply warning labels, place appropriate lids on the containers, and fill out information tags attaching them with jute, ribbon, or latigo lace. The candle is now ready to sell. I pack it safely into a closed box until it is time to sell it.


The candle making process takes a few hours to complete. If you have any questions, don’t hesitate to contact us.
(719) 660-4177
No comments:
Post a Comment
All comments will be moderated by the author. Thank you.